Build Your Own Passive DI Box (video included)
Posted by Jonathan Beals on 2018 Nov 9th
We needed a DI Box to finish a project behind the scenes at Next Gen. Since we have all the parts on hand, we figured, why not make one?
Many of our commercial customers have shared their praise of the Hammond 1140-DB-A, so we designed this box around it. It is completely passive (does not require power), which means there are some limitations to its use. It would be ideal for use with guitars that have medium/high output passive pickups and active pickups. But, being a higher grade transformer with low noise, it could arguably be used with quieter sources as well (within reason).
The box will include a 1/4" input, 1/4" out/thru (to send to your pedalboard/amp), XLR output (to send to the interface/mixer), and a ground lift switch.
First off, what is a DI Box for and why do you need one? There are a lot of uses for a DI box, many of which people don't realize. The first and most obvious is for plugging guitars directly into an interface or mixer (as you would do if you record using VST/software-based amp sims). Even today, most interfaces and mixers can't handle a direct signal from a guitar due to the impedance mismatch. The guitar will overdrive the input on the device, and you won't even know it (except that it won't sound good). Ironically, many of the terrible initial reviews from people first trying software-based amp sims are actually the result of this issue.
A couple of other common applications include:
- Splitting your guitar signal when recording. One out to the amp and one "dry" signal to the board. That way you have a dry guitar track that you can re-amp later if the original tone doesn't work out.
- Splitting your acoustic guitar's signal between your amp and the mixer. That way you can have your amp for self-monitoring on stage, but the soundman will still have the dry signal from the acoustic that he can mix himself (assuming you trust him, lol).
There are many more, but that will get you started.
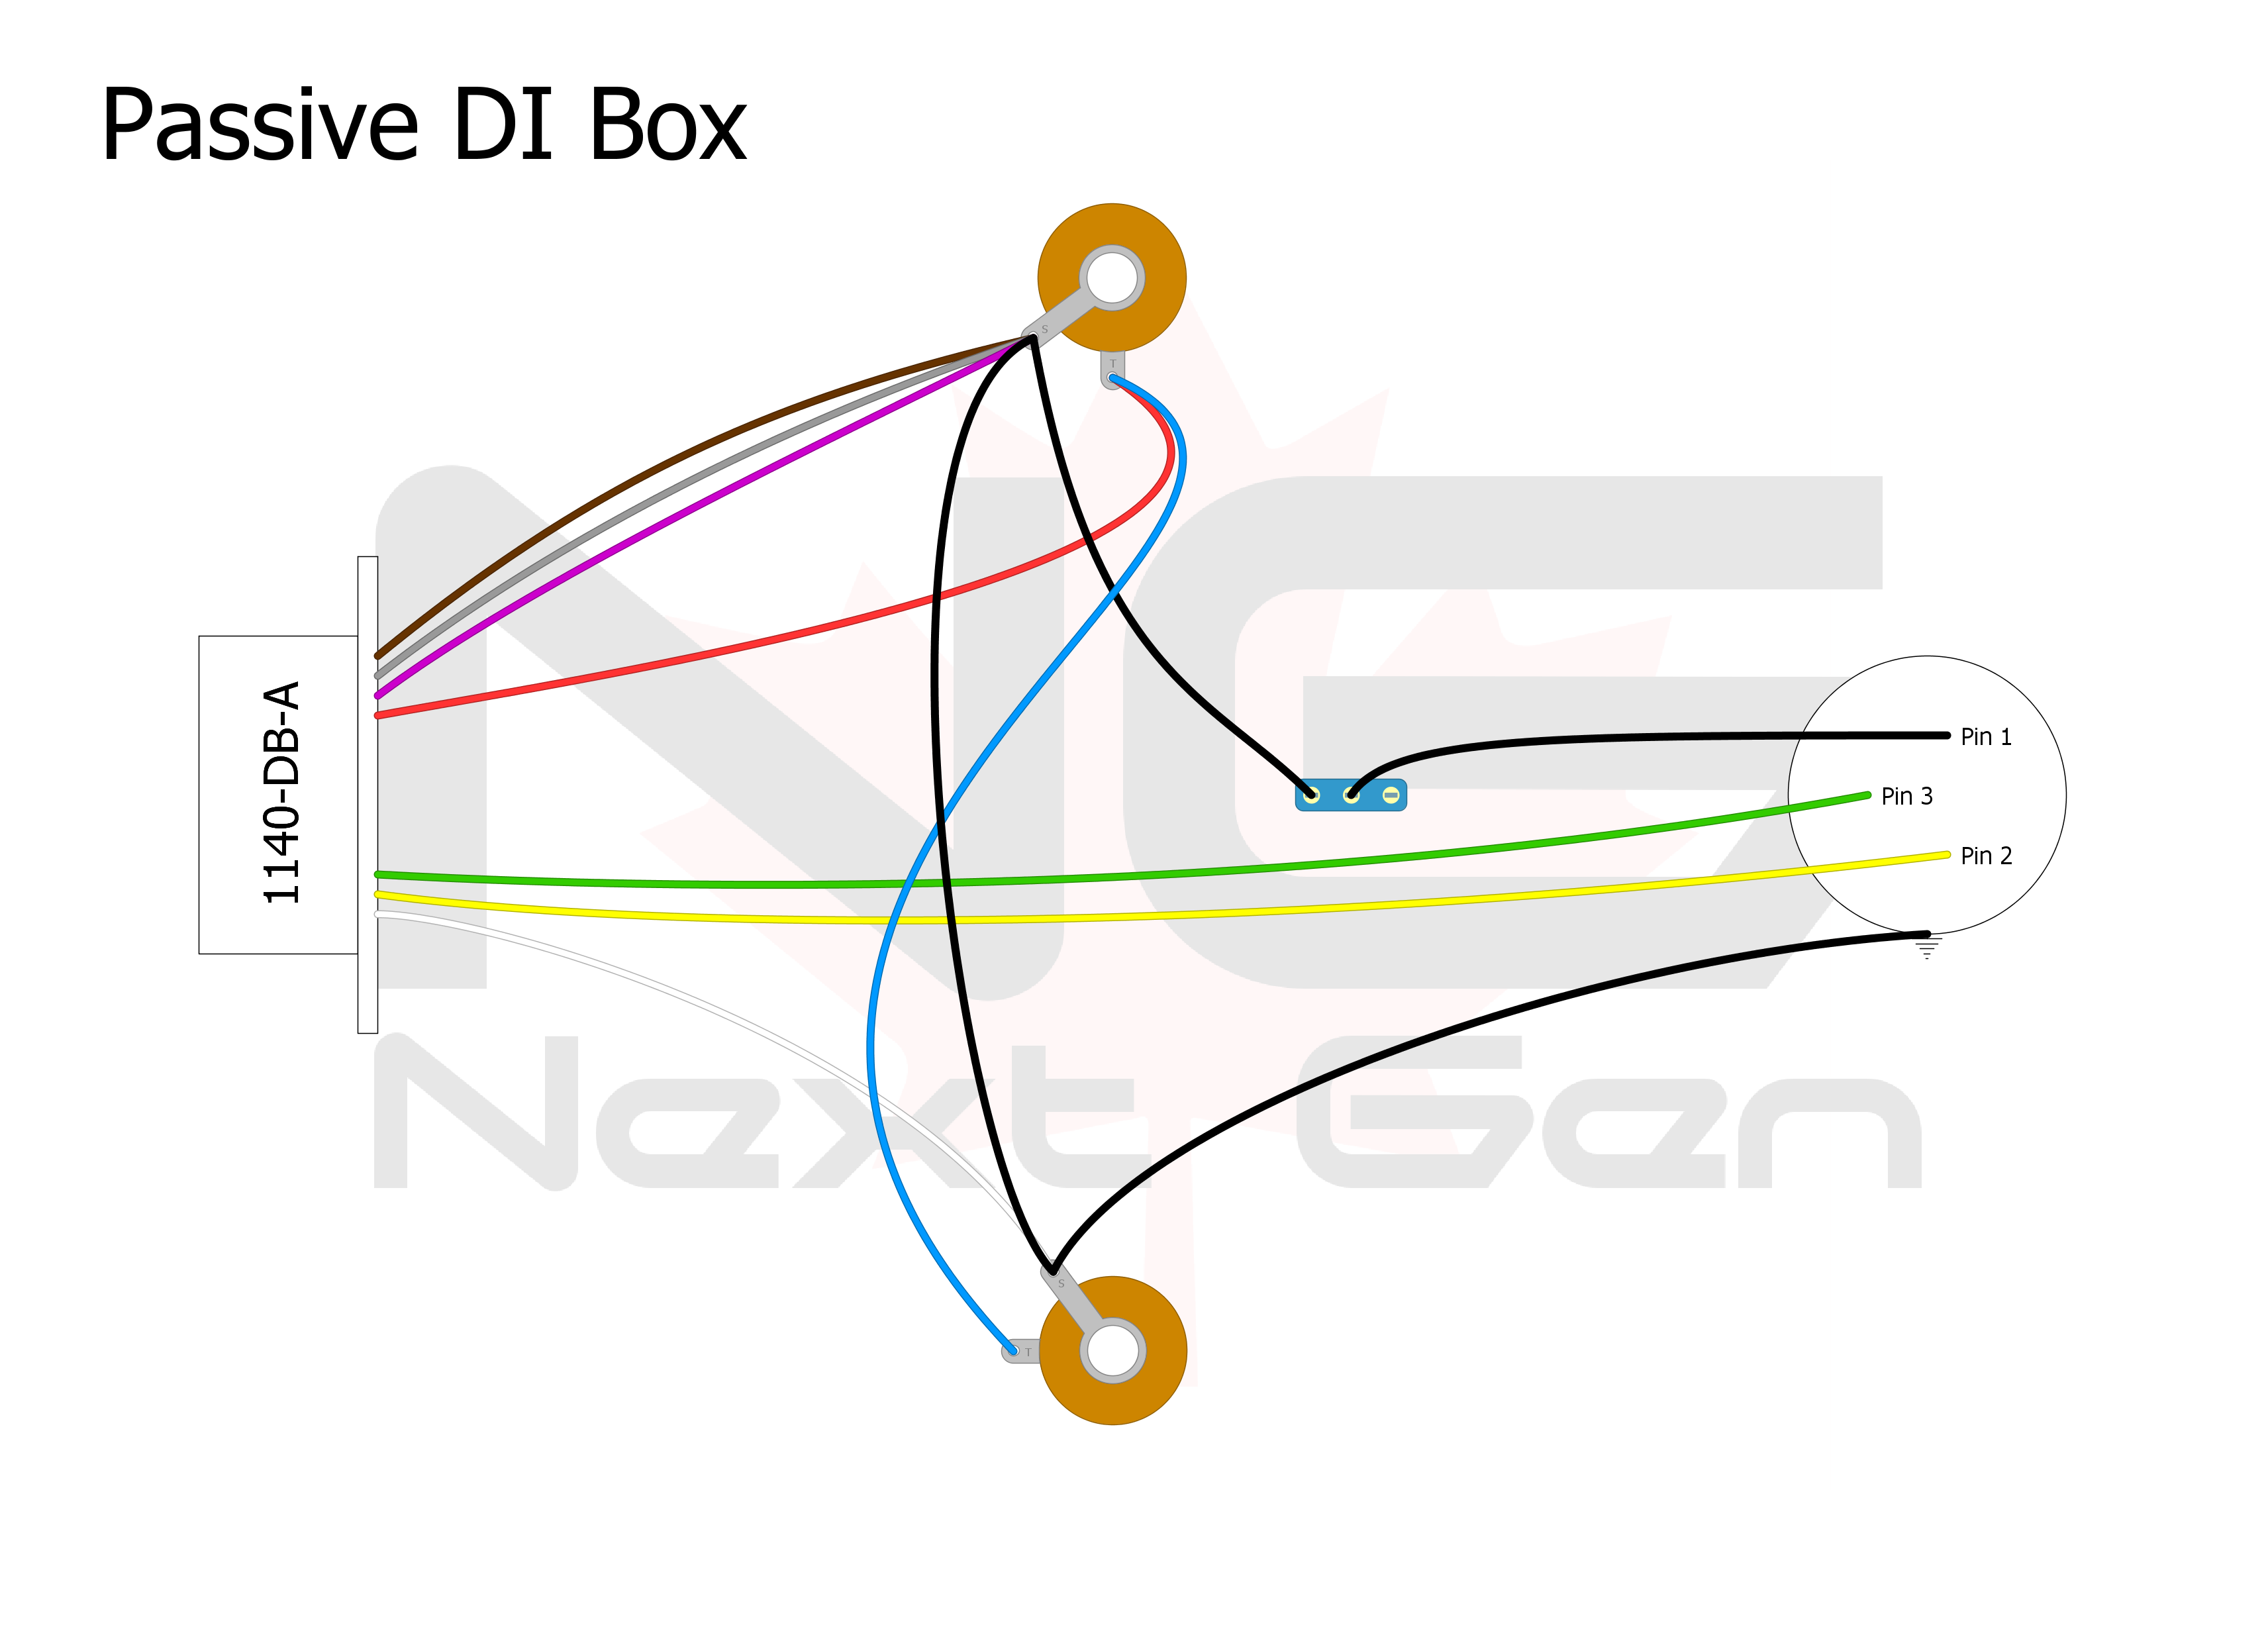
Here is the basic layout we came up with (note that the white wire is actually grey with white stripes and the yellow wire is green with yellow stripes):

...and a schematic:

Here is a list of the parts you'll need:
1x - 125B Pedal Enclosure
1x - Hammond 1140-DB-A
2x - Switchcraft #11
1x - Switchcraft D3M
1x - SPST Mini-Switch (we actually used SPDT; it doesn't really matter what kind you use, as long as it fits and you know how to wire it)
1'x - Black Wire (at least 24AWG)
1'x - Blue Wire (at least 24AWG)
You'll have to source the hardware from your local hardware store:
2x - 1 1/2" #6 machine screw (for the transformer)
2x - #6 nut with matching thread
2x - #6 lock washer
2x - 1/2" #4 machine screw (for the XLR jack)
2x - #4 nut with matching thread
2x - #4 lock washer
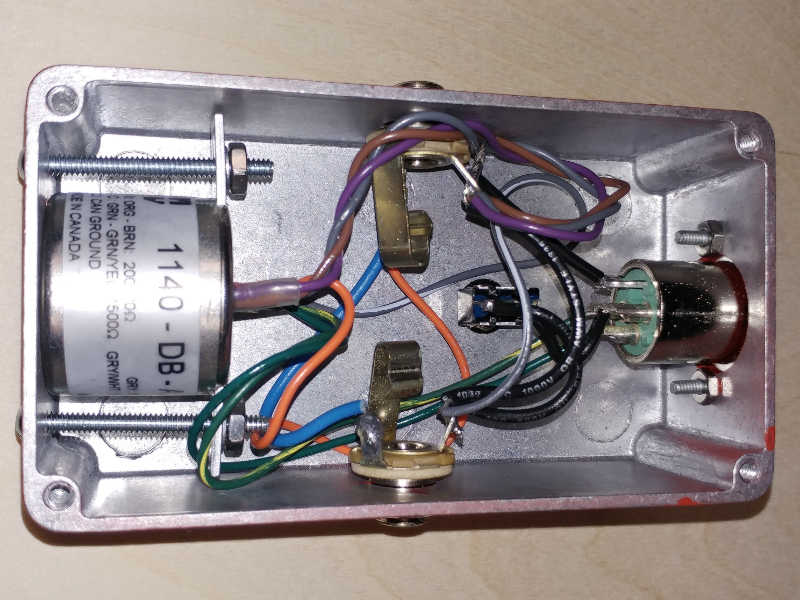
Here is a "gut shot" of the finished project. The wiring differs slightly from the layout above, but is still properly wired.

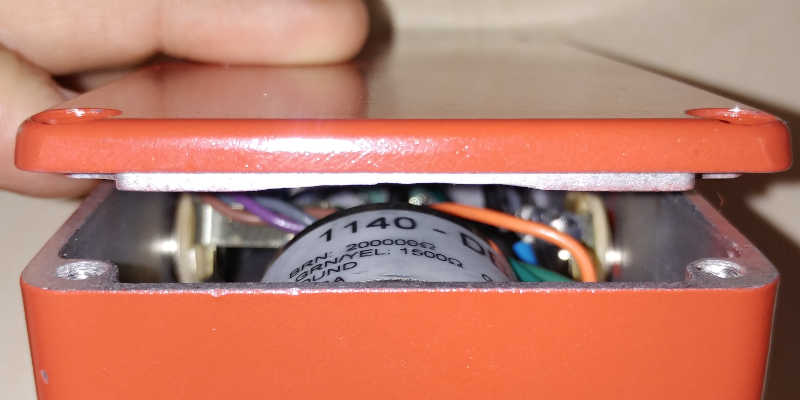
We opted to screw the transformer in place. Some builders just let it float around loosely with some padding to hold it in place and others just use double-sided foam tape. It's up to you. The Hammond 11140-DB-A is big transformer compared to most DI Box transformers, so it a VERY tight fit inside a 125B. In fact, we had to scrape down some of the bottom plate of the enclosure in order for it to fit.

As is, this project would cost $100-$150 CAD to build. The Hammond 1140-DB-A is a higher end transformer designed for professional audio applications, so it isn't cheap. To save some money, you could opt for a cheaper transformer from another source and use the schematic above as a guide.
Build safe and build awesome!
