How to Solder a Switchcraft #228 "Pancake" Plug (Video Included)
Posted by Jonathan Beals on 2018 Aug 10th
These plugs are great for pedalboards. Use the right technique when soldering the connector and you'll have a truly road-worthy cable! We are new to the filming thing, so there was a lot that was missed. :(
Read on for more detailed instructions.
Step 1: Prep the Guitar Cable
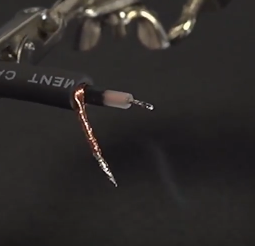
Strip off about 1/2" off the cable's outer jacket. Carefully peel back the spiral shielding and twist it together. Strip off 2/3rds of the conductive black shielding revealing the inner jacket. Strip off 1/2 of the visible inner jacket. In the end, you should have about 3/16" of exposed "hot" center wire, about 3/16" of the inner jacket, and 3/16" of the conductive black shielding. Of course, with the shield wire still connected, but twisted off to the side.

Step 2: Apply Flux and Pre-Tin Key Connection Points
Dip the end of the "hot" and the twisted ground into some flux and pre-tin the wire by applying a light coat of solder. Brush a light coat of flux onto the side edge of the inner body of the plug, and flow some solder onto it to make the ground connection easier.
Step 3: Solder, Solder, Solder
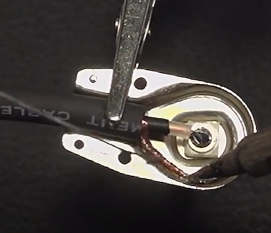
Insert the "hot" into the center space of the plug and bend it back at a 90 degree angle and clamp the cable to hold it in place. Flow solder into the center space of the plug to create a strong joint between the hot and the center of the plug. Line the twisted ground wire along the inside of the plug (where you pre-tinned), and solder the ground wire to the body of the plug.

Step 4: Seal It Up Nice And Tight
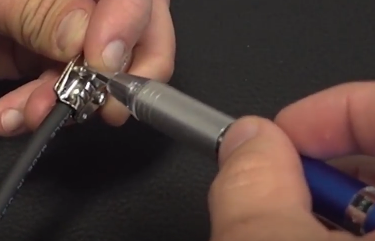
Double check that the "hot" wire isn't touching any grounded surfaces on the plug, the conductive black shielding isn't making contact with the "hot", and ensure all soldered joints are nice and tight. If it's all good, screw the back of the plug on.

Step 5: Pat Yourself On The Back
Congratulations! You've just made a better cable!
