
Replacing An Output Jack (Video Included)
Posted by Jonathan Beals on 2018 Sep 14th
Our customers may not realize that we actually write and record all of the intro and background music featured in our videos. It's never anything overly polished, but it gets our creative musical juices flowing and gives us a chance to work on our chops. It is certainly a highlight of our week when we get the chance to do it, but apparently even a parts distributor such as us can suffer unexpected technical difficulties. You can thank the owner for the remarkably low media budget providing such cheap gear!

I was trying to lay down the bass line for a short intro lick to a video series we are working on, but was experiencing intermittent failure and narrowed it down to the output jack. Kamil was smart and quick enough to grab the camera to make a sort of VLOG style repair video. Unfortunately, it is a little thin on useful details but it shows just how easily and quickly you can repair something when you have the parts, tools, and skill required. In mere minutes, I was able to replace the jack and get back to recording.

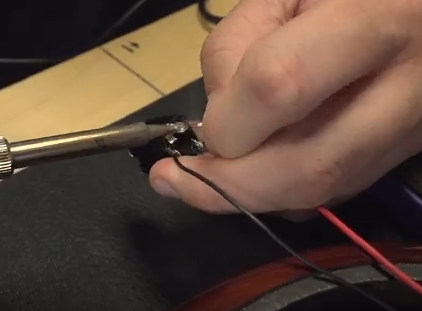
Step 1: Remove the Old Jack
Not too difficult. I opted to de-solder it, but you could just clip the leads at the solder lugs if that's what you prefer. Either way, keep it to see if you can clean and repair it. You can never have too many spare parts so don't throw it out unless absolutely necessary. You never know when it might come in handy.
Step 2: Solder the New Jack
Follow the usual soldering practices. Apply flux to the jack lugs. Strip and re-tin the wire if you clipped the leads. Solder the hot to the "tip" lug. Solder the ground to the "sleeve" lug. The bass guitar in the video used active electronics so there is a third wire for the battery. In that case, the battery lead is supposed to be soldered to the "ring" lug. Guitars with active pickups aren't all wired the same, so don't assume this is the correct wiring in all cases.
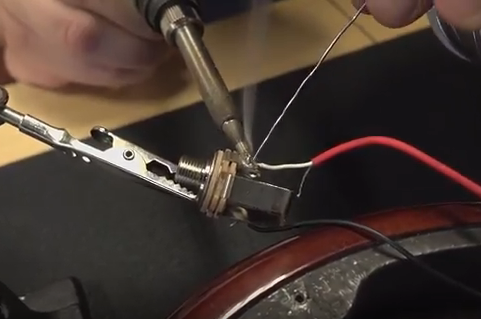
Some Useful Info About Active Electronics
The "ring" and "sleeve" will be connected when a standard guitar cable is plugged in thanks to the long sleeve on the plug being inserted. That way, the battery won't drain when nothing is plugged in. But, when the plug is in, it closes the circuit so power can flow through the active electronics. This is most often accomplished with a stereo jack, but it can just as easily (and arguably more effectively) be done with a Switchcraft #13 or other similar switching jack that has a "make" circuit.

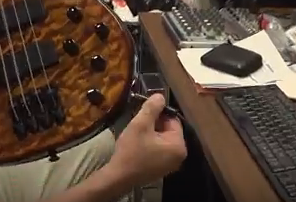
Step 3: Test It Out
Don't just plug in and play. Jiggle the plug. Try to recreate the issue you had before the replacement. There should be no sign of issues now. If you've done it well using a decent quality jack, you'll likely never have a problem again.
Step 4: Make Some Money
You'd be surprised how few people are able to repair their own gear. If you have the skill, offer to do it for a small fee for musicians you know. If you get good enough, you might be able to turn it into a decent side income. If you come to love it, you might turn it into a career.

Step 5: Be Awesome
Use your newly repaired instrument to shock and amaze your bandmates, coworkers, friends, and family with your musical prowess!

Also, if you would be so kind as to subscribe to our YouTube channel, that would be fantastic!